Servings: 1 loaf
Equipment
Ingredients
In a quart size jar with a lid (this is your Levain)
- 150 grams active sourdough starter
- 60 grams hot water
- 60 grams bread flour I use King Arthur's
In a large bowl (this is your Autolyze)
- 420 grams bread flour
- 300 grams hot water
In a small jar or ramakin
- 10 grams sea salt
- 20 grams hot water My hot water temp is 115℉
Additonal
- Rice flour for dusting
- Bread flour for shaping and surface of counter
Instructions
Day 1:
- Take out your Mother, let her warm up. This will take a few hours, I put mine in the oven with the light on)
- Once warm, in a jar, measure 150 grams of starter, 60 grams of hot water, and 60 grams of four. Stir until all combined, place lid on tightly, and mark the height of the starter with a rubber band to track growth. Let sit for 2-4 hours or until the starter more than doubles in size. Put the starter in a warm, draft-free place. (oven with light on)Depending on how active your starter is, (how often you use it and feed it) depends on how long this will take. You might need to repeat this step if you don't have a very active starter. Repeat in a new clean jar and discard what you don't use. You should get to know your starter for an accurate time schedule. The humidity and temperature of each kitchen can differ.*Friendly reminder: put a note on the oven that you have starter or dough in it, that way no one accidentally turns on the oven!
- After you get the starter jar going, in a large bowl, combine your 420 grams of flour with 300 grams of hot water. I combine and mix with my hands. It will look a bit dry/shaggy when it comes together. As long as all the flour is fully incorporated, it's good. Place a lid on your bowl, or cover it with plastic wrap and set it in the oven or a warm draft-free area.In a small jar or bowl, add 10 grams of salt and 20 grams of hot water. Give it a stir to let the salt dissolve in the water. I usually let this set for about 30 minutes, I then give it a few stirs as I walk by it.
Feed your Mother
- After I get the starter, and bowl of flour/water mixture done. I feed my Mother and get her back in the fridge until next time. I feed her 100 grams of flour and 100 grams of hot water. Give her a good stir til all the flour is combined, screw lid on tight and get her back in the fridge.*I bake once a week and this keeps my starter fed, nice, active, and happy.
Add in the salt water
- After about 30 minutes or so, I take the salt water and dump it into the bowl of my shaggy dough mixture. Using my hands, I mix in the salty water until it is fully combined. Then place the lid back on and let the dough rest until my starter has more than doubled.
Once our starter had more than doubled
- Once we see that our starter hadsmore than doubled, and is active, (big and bubbly) and has not fallen down, (literally meaning the level isn't falling down the jar yet) pour the starter into the bowl of dough. Mix together until fully combined. It will be a little sticky.Once combined, cover with lid or plastic wrap, and place in the bowl in the fridge overnight or 12-18 hours.
Day 2
- Take your bowl out of the fridge and get it warmed up to room temp. Again, I put it in the oven with the light on. This will take 1-2 hours. *Remember to put a note on the oven that you have dough in it so no one accidentally turns on the oven!
- Once it's about room temp, this is when you will do a series of stretch and folds. Do a minimum of 3, but I try to get in 6. This is what helps build up the gluten, and gives it the texture and consistency you are looking for.
Stretch and fold
- To perform the stretch-and-folds, leaving the dough in the bowl, sprinkle the top with four, use one hand to hold the bowl and the other hand to pick up the edge of the dough farthest from you. Stretch it up as far as it extends without tearing; then fold it over itself. Turn the bowl, and repeat all around the perimeter of the bowl. Sprinkle the top with four again, cover, and place the dough back in the warm area for each rest.Do this 3 times, 20 minutes apart. *Note: As you learn your starter and your dough, you will learn little ways to tweak and help yourself. The dough gets less sticky as you do your stretch and folds. I have had my dough be super wet and seemed like it was still an active starter. So I did 6 stretch and folds, I add a nice sprinkle of flour on top each time I do the stretch and folds, and poke my fingers in and around to get the flour in the dough a little, then I start my stretch and folds. Then another sprinkle of flour on top, cover it with the towel until the next stretch and fold, repeat. It tamed down the bubbles and grew the gluten to where it baked up perfectly. I wasn't sure what I was doing when I first started this, but it's working for me.
Proof
- After you have performed your last stretch-and-fold, gently turn the dough onto a lightly floured surface (I find a little flour helps with the stickiness of the dough) Shape the dough by gently folding the bottom third of the dough up to the middle, then the left third up and over the middle, then the right side up and over, and finally fold the top up and over the bottom of the dough. Carefully roll the dough over so the seam side is down (rolling away from you) and pull lightly toward you to tighten the seam if needed. Use a banneton (woven basket with lined cloth) or a medium size bowl with a cotton cloth; lightly dust with rice flour or bread flour. Carefully place your dough, seam side up in the banneton (so the bottom of the dough is facing up). Pinch the seam so that the bread dough is all closed up. Seal the bowl with plastic wrap and place it in the fridge for an hour to proof. *OR I even put mine in the fridge until the next day to bake. I feel this works well for busy schedules. But it does end up a 3 day process.
Baking
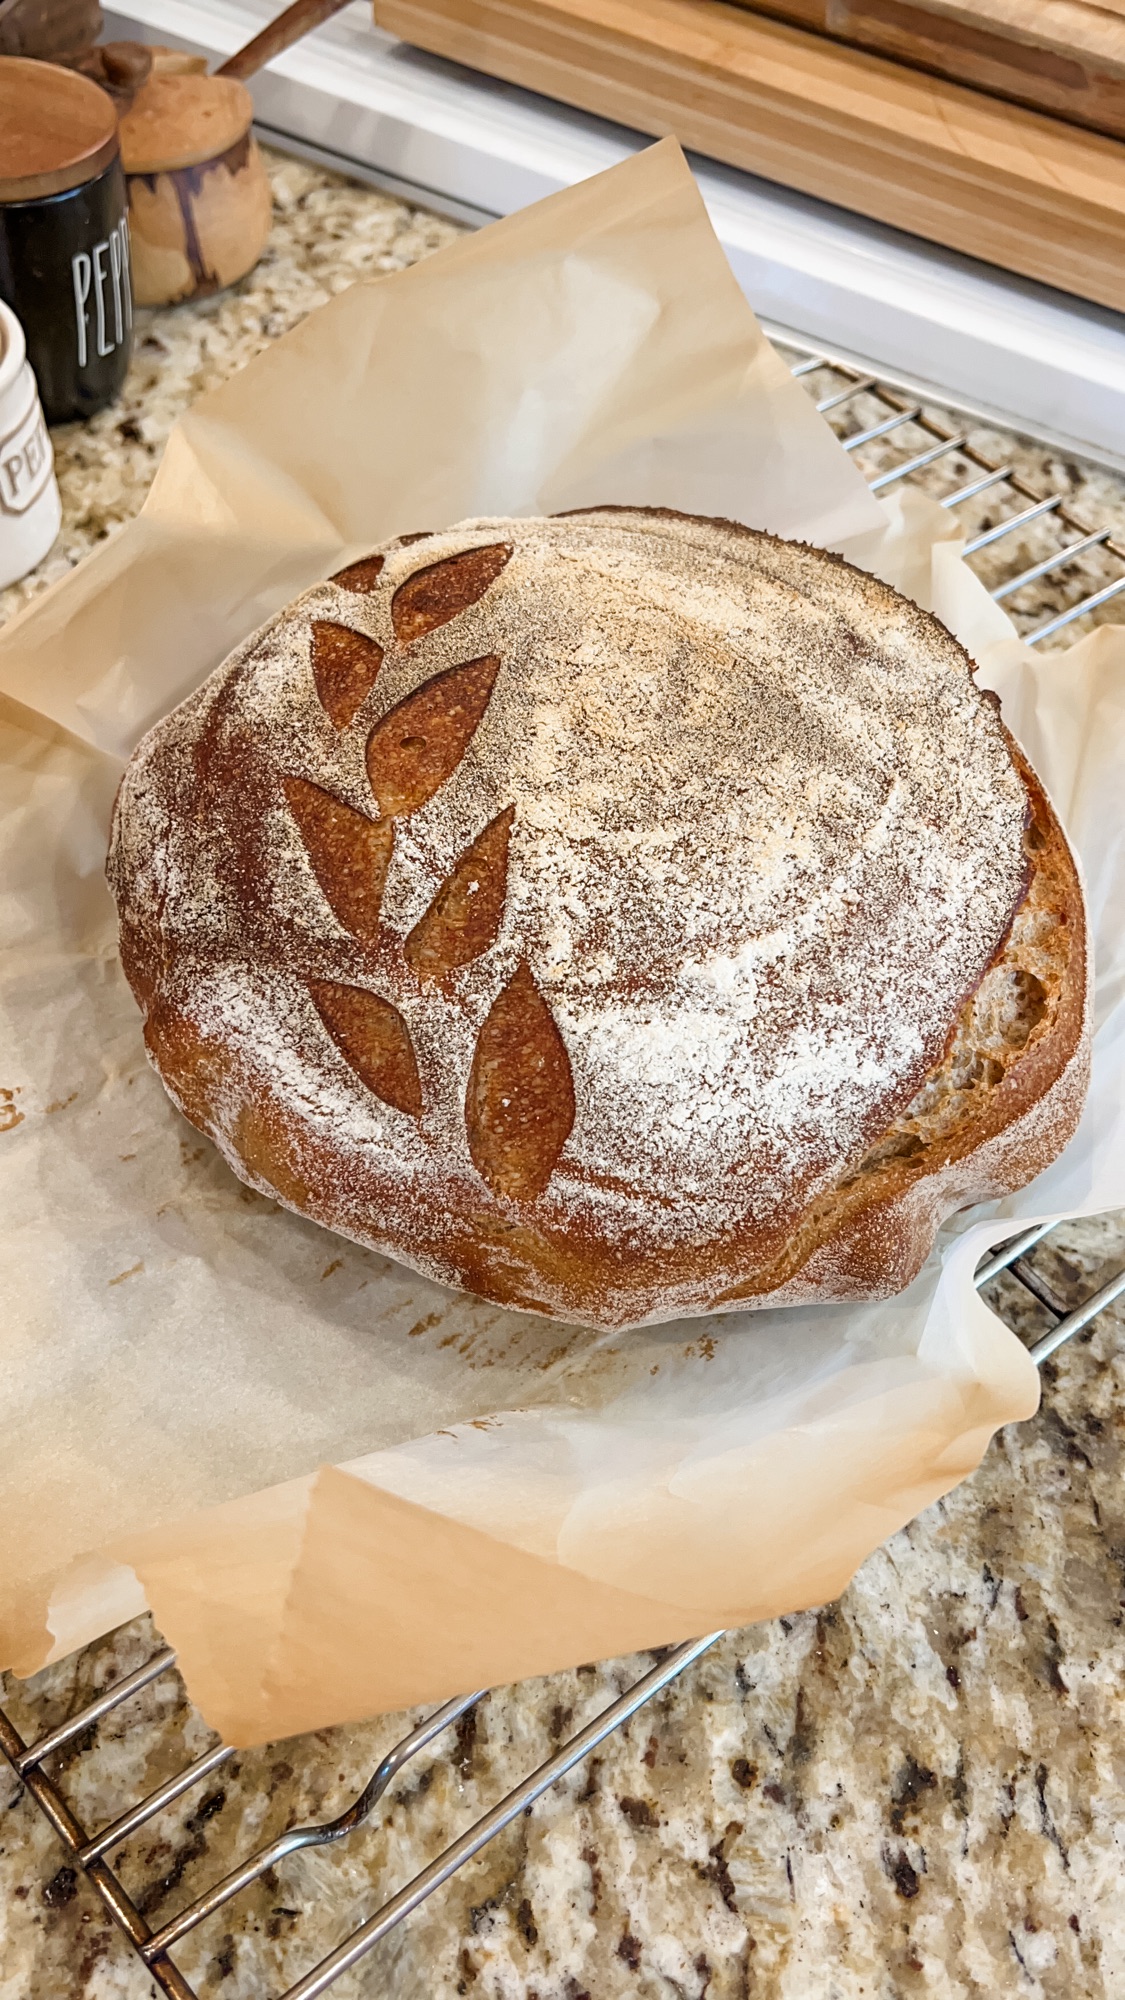
- Preheat the lid and base of a cast-iron combo cooker or Dutch oven to 500℉ for 25 minutes. Or 10 minutes after the oven comes to temp. My oven takes forever to get to temp. You want your cooker uniformly hot!Leave your dough in the banneton or bowl, in the fridge right up til the time you're ready to bake. When ready, remove the plastic wrap, lightly dust the exposed side of your loaf with rice flour, and turn it out onto a large square of non-stick parchment paper. (You can dust the parchment with semolina or rice flour also if you'd like) Using a single razor, score the dough lengthwise from the top to bottom, about ¼ inch deep at about a 45-degree angle. Carefully place the loaf into hot Dutch, with the lid on, and bake for 20 minutes at 500℉.Remove the lid, lower the oven temp to 470℉, and bake for an additional 20-25 minutes, or until the loaf is a deep golden brown color. (It is okay if there is a little bit of char; it should be very well done) The internal temp of fully cooked sourdough is 205-210℉Remove the bread and cool completely on a wire rack. *If you're baking more than one loaf, give the pot plus lid, another 10 minutes preheat at 500℉ and repeat the process.Let the loaf set for at least an hour before you slice and enjoy. Store on the counter loosely wrapped in a kitchen towel for up to 2 days and then in a resealable bag up to a few days more. Or you can slice and freeze. I find my sourdough is easiest to cut a day later and after being in the fridge.
Tried this recipe?Let us know how it was!